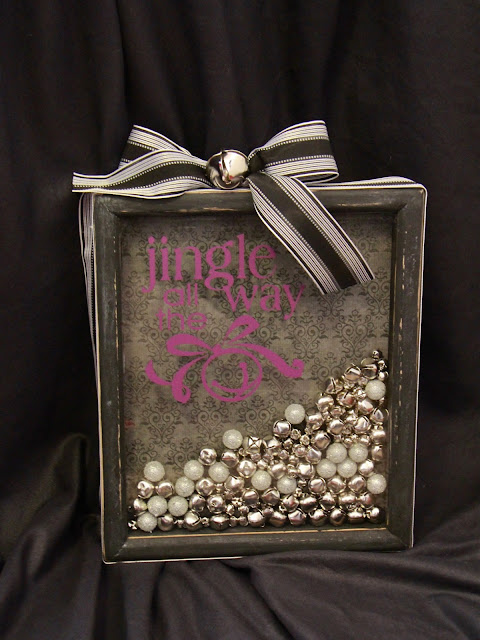
Last Saturday was simply fabulous. I got to hang out with my crafty sister-in-law (you can check out her awesomeness on My Artistic Ventures) and two of her friends. We crafted all afternoon. I can't quite pin down what was so magical about the day, but it just was. Trust me. Beads, glitter, paint, and ribbon somehow equal bliss when combined with a few intriguing and intelligent people to hang out with.
So anyways, I thought I would do a short DIY instruction and show off what I put together. This will be my first DIY craft post (and possibly my last if it turns out goofy) so just ask any questions in the comments and I will attempt to give quick replies.
You will need:
If using an unfinished shadow box, paint it right away so it can dry.
Cut paper to fit the inside backing of the frame and affix the paper with glue.
Once frame is dry, rough edges if desired.
Make sure glass is completely clean and free of debris prior to filling with bells and/or beads.
Then fill and close up the back.
Adhere vinyl lettering.
Cut ribbon to desired length and strategically place hot glue at corners to tack down.
Tie bow as desired.
Add additional embellishments as desired to top of frame.
The two shadow box crafts were created from unfinished shadow boxes that my grandfather made.
So anyways, I thought I would do a short DIY instruction and show off what I put together. This will be my first DIY craft post (and possibly my last if it turns out goofy) so just ask any questions in the comments and I will attempt to give quick replies.
 |
| Photographed by The Peacock Girl |
You will need:
- shadow box frame -- finished or unfinished
- craft paint (for unfinished shadowbox)
- sandpaper (if you roughing up the edges)
- one sheet of scrapbook paper
- adhesive (craft glue, glue gun, etc.)
- ribbon
- jingle bells, beads (assorted sizes)
- vinyl lettering
If using an unfinished shadow box, paint it right away so it can dry.
Cut paper to fit the inside backing of the frame and affix the paper with glue.
Once frame is dry, rough edges if desired.
Make sure glass is completely clean and free of debris prior to filling with bells and/or beads.
Then fill and close up the back.
Adhere vinyl lettering.
Cut ribbon to desired length and strategically place hot glue at corners to tack down.
Tie bow as desired.
Add additional embellishments as desired to top of frame.
 |
| All Vinyl by Cheri @ Creative Impressions |
 |
| This tile and Merry Christmas shadow box photographed by The Purple Lady |


How fun. sad to miss all the goings on. Check out my "Painted chair"
ReplyDeletesk
So cute! I love the jingle bells.
ReplyDeleteNicely done! Thanks for sharing on my Blog Frog community.
ReplyDeleteI love this, what a great idea!
ReplyDeleteSo cool. My crafty daughter is going
ReplyDeleteTo help me make a few of these~Connie
First off, I am so happy to see a comment from you! Secondly, if you run into problems on the instructions, just tweet me :)
DeleteI love to craft. Thanks for the idea.
ReplyDelete